Hey there, crafty friends! Get ready to sprinkle some starry magic into your lives because today, we’re diving into the delightful world of amigurumi with our fantastic Amigurumi Star Pillow Free Crochet Pattern!
Imagine a plump, huggable star, stitched with love and ready to bring a smile to any face. These adorable pillows are bursting with charm, featuring a lovely textured surface and a squishy, lovable form. They’re the perfect size for little hands to cuddle, a cozy addition to a nursery or playroom, or even a whimsical accent for your own sofa!
Whether you’re just dipping your toes into the wonderful world of amigurumi or you’re a seasoned pro looking for a quick and rewarding project, this pattern is designed with you in mind. We’ll guide you step-by-step, making it super accessible for beginners. So grab your hook and some yarn, and let’s get crocheting these starry beauties!
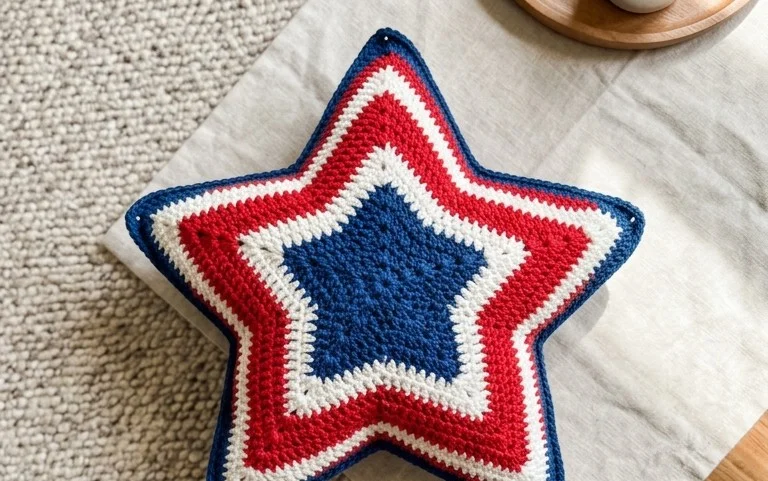
Crochet Your Own Cosmic Comfort: The Amigurumi Star Pillow Free Pattern
Oh, hello there, fellow crafters! Are you ready to add a touch of whimsical charm to your home décor? Or perhaps you’re on the hunt for a unique and cuddly gift for a special someone? Well, you’ve landed in the right place! Today, we’re diving headfirst into the delightful world of the Amigurumi Star Pillow, a free crochet pattern that’s as fun to make as it is adorable to behold. This pattern, featured by the ever-inspiring DIY Magazine, offers a fantastic opportunity to explore the joys of amigurumi while creating a statement piece for any room.
Amigurumi, the Japanese art of crocheting or knitting small stuffed yarn creatures, is known for its intricate details and huggable results. And this Star Pillow takes that concept and amplifies it with a celestial twist! Imagine a plump, friendly star, perfect for propping up against on the sofa, adorning a child’s bed, or even hanging as a festive decoration. This pattern is designed to be accessible, making it a wonderful project for those dipping their toes into amigurumi for the first time, while still offering plenty of creative potential for seasoned crocheters.
Yarn & Hook: Your Cosmic Crafting Companions
Choosing the right yarn and hook is paramount to bringing your Amigurumi Star Pillow to life. For this pattern, we recommend a yarn that offers a good balance of softness and structure. Worsted weight yarn (also known as Aran weight in some regions) is a popular choice for amigurumi as it creates a satisfyingly dense fabric that holds its shape well without being too stiff. This also means your pillow will be delightfully huggable!
When it comes to fiber content, cotton or a cotton blend is a fantastic option. Cotton is breathable, durable, and washes beautifully, which is ideal for a pillow that might see a lot of use. Alternatively, acrylic yarns are also excellent – they are readily available in a rainbow of colors, are usually budget-friendly, and are also washable. For a super-luxurious feel, you could even explore some chenille or velvet yarns, though these can be a bit trickier to work with for beginners.
The accompanying hook size will depend on your chosen yarn and your personal crocheting tension. Generally, for worsted weight yarn and amigurumi, a hook in the range of 3.5mm to 5.0mm (US sizes E-4 to H-8) is recommended. A slightly smaller hook than what’s suggested on the yarn label will help create those tight stitches that are crucial for preventing stuffing from peeking through. Experimenting with a couple of hook sizes on a small swatch is always a good idea to find your perfect match!
Essential Stitching Techniques for Your Starry Creation
This Amigurumi Star Pillow pattern primarily utilizes a few fundamental crochet stitches, making it a great learning project. You’ll be working in continuous rounds, which is a hallmark of amigurumi construction. This means you won’t be joining rounds with slip stitches and chaining up; instead, you’ll be using a stitch marker to keep track of the beginning of each round.
Here are the key stitches you’ll need to master:
- Magic Ring (or Magic Circle): This creates a tight, adjustable starting point for your amigurumi pieces, ensuring no holes at the center.
- Single Crochet (sc): This is the workhorse stitch of amigurumi. It creates a dense fabric perfect for stuffing.
- Increase (inc): This stitch involves crocheting two single crochets into the same stitch. It’s used to gradually widen your piece as you work in the round.
- Decrease (dec): This stitch involves crocheting two stitches together as one. It’s used to shape and close your amigurumi pieces. The invisible decrease (often abbreviated as ‘invdec’) is highly recommended for amigurumi as it creates a much neater, less noticeable decrease than a standard decrease.
- Slip Stitch (sl st): While not used for the main body of the pillow in continuous rounds, you might use slip stitches for fastening off or for any embellishments.
Don’t worry if you’re not familiar with all of these! The beauty of free online patterns and resources like DIY Magazine is the wealth of tutorials available. A quick search for “how to crochet a magic ring” or “invisible decrease crochet tutorial” will provide you with plenty of video and photo guides to get you up to speed.
Tips for Beginners: Charting Your Course to Crochet Success
Embarking on your first amigurumi project can feel a little daunting, but with a few handy tips, you’ll be well on your way to a finished Star Pillow!
- Read Through the Pattern First: Before you even pick up your hook, take a moment to read the entire pattern from start to finish. This helps you understand the overall construction and identify any stitches or techniques that might be new to you.
- Invest in Stitch Markers: These are your best friends in amigurumi! Use them to mark the beginning of each round. Without them, you’ll quickly lose track and end up with a wonky shape.
- Tension is Key: Aim for consistent, tight stitches. If your stitches are too loose, the stuffing will show through. If you’re struggling with loose stitches, try going down a hook size.
- Stuffing Wisely: Stuff as you go! Don’t wait until the very end to stuff your pillow. Stuff in small increments, ensuring you push the stuffing evenly into all the points of the star. Use a crochet hook or a stuffing tool to help push stuffing into those tight corners.
- Don’t Be Afraid to Undo: Crocheting is a journey, and sometimes that means frogging (undoing stitches). If you realize you’ve made a mistake, it’s better to go back and fix it early on than to continue with a flaw that bothers you.
- Watch Video Tutorials: Amigurumi techniques, especially the magic ring and invisible decrease, are often best learned visually. YouTube is an absolute treasure trove of free tutorials.
Customizing Your Celestial Creation
One of the most exciting aspects of crochet is the ability to personalize your projects. This Amigurumi Star Pillow pattern is wonderfully adaptable!
Color Play: Painting with Yarn
The possibilities are truly endless when it comes to color. You can stick to a classic yellow for a traditional star, or let your imagination run wild!
- Rainbow Star: Use a different color for each of the star’s points, or alternate colors every few rounds.
- Ombre Effect: Gradually transition from a darker shade to a lighter shade of the same color.
- Two-Tone Wonder: Alternate two complementary or contrasting colors.
- “Night Sky” Star: Use dark blues, purples, and blacks, perhaps even adding small white embroidered stitches for stars.
- Soft Pastels: For a nursery or a more subtle aesthetic, soft pinks, blues, and mint greens are lovely.
Size Matters: A Star for Every Space
While the free pattern likely provides specific dimensions, you can often adjust the size of your amigurumi by simply changing the hook size or the yarn weight.
- Smaller Star: Use a lighter weight yarn (like DK or sport weight) and a corresponding smaller hook. This will create a miniature star, perfect for a keychain or as part of a mobile.
- Larger Star: Use a bulkier yarn (like bulky or super bulky) and a larger hook. This will result in a wonderfully oversized, snuggly star pillow.
Remember to adjust your stitch counts accordingly if you’re significantly altering the size, especially when it comes to increasing and decreasing. Sometimes, you might need to add or subtract a few increase rounds to achieve your desired diameter.
Care Instructions: Keeping Your Star Bright
To ensure your Amigurumi Star Pillow remains a cherished item for years to come, proper care is essential. Always check the yarn label for specific washing instructions, but generally, here are some guidelines:
- Hand Washing is Best: For most yarns, hand washing in cool to lukewarm water with a mild detergent is the safest option. Gently squeeze out excess water without wringing.
- Machine Washing (with caution): If your yarn is machine washable (check the label!), place your star pillow in a mesh laundry bag or pillowcase. Wash on a gentle cycle with cold water.
- Drying: Reshape your pillow while damp and lay it flat on a clean towel to air dry. Avoid hanging it, as this can distort the shape. Never put amigurumi in a high-heat dryer, as this can melt synthetic fibers and shrink natural ones.
- Spot Cleaning: For minor spills, you can often spot clean with a damp cloth and a little mild soap.
Beyond the Pillow: Project Ideas to Spark Your Creativity
While the Amigurumi Star Pillow is a fantastic project on its own, the skills you’ll learn and the techniques you’ll employ can be applied to a universe of other amigurumi creations!
- Star Garland: Make several smaller stars and string them together for a celestial bunting.
- Star Ornaments: Crochet mini stars and attach a loop for hanging them on your Christmas tree or as gift toppers.
- Amigurumi Animals: The magic ring, single crochet, increases, and decreases are the building blocks for countless adorable stuffed animals.
- Coasters or Potholders: Use a similar star shape but with thicker yarn and fewer stitches to create functional home décor.
- Keychains: Miniature versions of the star pillow make adorable and personalized keychains.
So, there you have it! The Amigurumi Star Pillow pattern from DIY Magazine is an invitation to create something truly special. With a little patience, the right materials, and a dash of your own unique flair, you’ll soon be cuddling up with your very own handmade celestial friend. Happy crocheting!
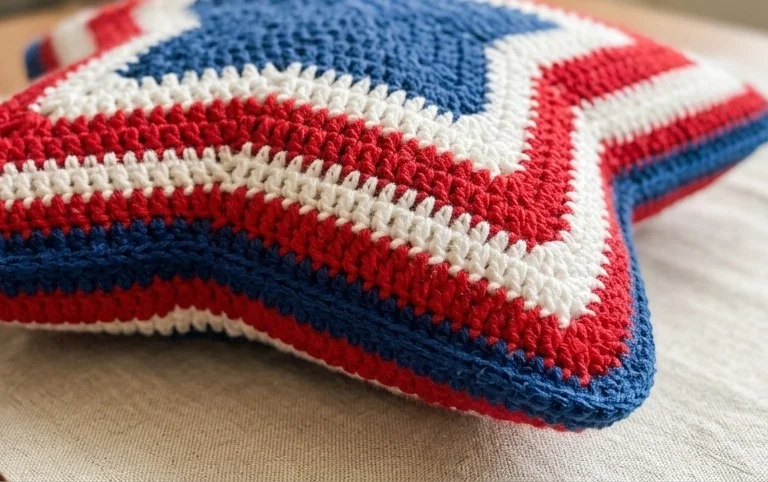
And there you have it – your very own cuddly amigurumi star pillow, ready to bring a touch of handmade magic to any space! We hope you’ve enjoyed this free crochet pattern and are eager to cast on. Don’t forget to share your adorable creations with us on social media using #AmigurumiStarPillow – we absolutely love seeing your unique interpretations!
Feeling inspired? Consider experimenting with different yarn colors, adding embroidered facial features, or even attaching ribbons for a whimsical touch. The possibilities are endless! And if you’re looking for your next crochet adventure, be sure to explore more delightful patterns right here on DIY Magazine.