Hello fellow yarn lovers! Get ready to sprinkle some cozy charm into your home with this delightful crochet project. Today, we’re diving into how to crochet a decorative pumpkin basket, a project that’s as fun to make as it is beautiful to display.
Imagine a plump, textured pumpkin, complete with a charming little stem, all crafted from yarn! This little treasure is perfect for holding small autumn treats, keys by the door, or even just as a sweet decorative accent on your mantelpiece. Whether you’re a crochet beginner eager to learn new stitches or a seasoned crafter looking for a quick and rewarding project, this pumpkin basket is ideal. It also makes a wonderfully thoughtful handmade gift for anyone who loves the fall season.
Throughout this pattern, you’ll learn simple techniques that build upon each other to create this adorable piece. We’ll guide you step-by-step, ensuring a successful and enjoyable crafting experience. Let’s get our hooks ready and create something truly special!

Crochet A Decorative Pumpkin Basket: Your Cozy Autumn Accent!
Fall is undeniably a time for cozy comforts, warm drinks, and of course, a touch of handcrafted charm! What better way to usher in the season than by creating your very own decorative pumpkin basket? This delightful project is perfect for adding a touch of rustic elegance to your home decor, holding your autumn treats, or even serving as a unique gift. Whether you’re a seasoned crocheter looking for a quick and satisfying project, or a beginner eager to dive into something festive, this pattern is designed to be both enjoyable and rewarding.
Gathering Your Autumnal Materials: Yarn and Hook Recommendations
To bring this charming pumpkin basket to life, you’ll want to select yarns that offer both texture and a beautiful autumnal palette.
Yarn Choices: For that classic pumpkin look, we highly recommend using worsted weight yarn. This weight is versatile, works up relatively quickly, and provides a good balance of structure for the basket and softness for the pumpkin’s curves. Natural fibers like cotton or a cotton blend are excellent choices as they offer great stitch definition and a slightly matte finish, mimicking the texture of a real pumpkin. Wool can also be used, but be mindful of potential felting if you plan to wash the basket frequently. For vibrant autumnal colors, consider shades of orange, deep rust, burnt sienna, mustard yellow, or even a creamy ivory for a more muted aesthetic. Don’t forget a touch of green or brown yarn for the stem!
Hook Size: The recommended hook size will typically be around a 5mm (H-8). However, this can vary slightly depending on your yarn choice and personal tension. You’re aiming for a fabric that is dense enough to hold its shape without being stiff. It’s always a good idea to make a small swatch with your chosen yarn and hook to check your gauge before you begin. You want tight stitches that won’t have large gaps, but not so tight that your hands become sore.
Mastering the Stitches: Your Crochet Toolkit
This pumpkin basket pattern utilizes a few fundamental crochet stitches, making it an excellent project for those looking to solidify their basic skills.
Magic Ring (or Adjustable Loop): This is the foundation for creating a seamless circle, perfect for starting the base of your basket. It allows you to create a tight center with no holes.
Single Crochet (sc): This is the workhorse stitch for much of the basket. It creates a dense and sturdy fabric, ideal for the sides of your pumpkin.
Half Double Crochet (hdc): Often used for the base of the basket, hdc creates a slightly taller stitch than sc, allowing for a quicker build-up of the base and adding a bit of textural variation.
Slip Stitch (sl st): Used for joining rounds and creating a neat edge, the slip stitch is essential for a clean finish.
Front Post Double Crochet (fpdc) and Back Post Double Crochet (bpdc): These stitches are key to creating the iconic ribbed texture of a pumpkin! By working stitches around the post of the stitch in the row below, you create raised ridges that mimic the natural segments of a pumpkin.
Tips for Beginners: Navigating Your Crochet Journey
Don’t be intimidated if you’re new to crochet! This pumpkin basket is a fantastic beginner-friendly project with a few tricks up its sleeve to help you succeed.
Read Through the Pattern First: Before you even pick up your hook, take a moment to read the entire pattern from start to finish. This will give you a general understanding of the flow and what to expect.
Understand Stitch Abbreviations: Make sure you’re familiar with the abbreviations used in the pattern. A quick online search can provide visual aids for each stitch if you’re unsure.
Use a Stitch Marker: This is your best friend for keeping track of the beginning of your rounds, especially when working in continuous rounds. Place it in the first stitch of each round.
Count Your Stitches: It’s crucial to count your stitches at the end of each round to ensure you’re on track. This prevents accidental increases or decreases that can throw off the shape of your project.
Don’t Be Afraid to Undo: Crocheting is a process, and sometimes you’ll make a mistake. That’s perfectly okay! Learning to gently pull out stitches (also known as “frogging”) is a vital skill.
Practice the Post Stitches: The front and back post double crochets are what give this pumpkin its signature look. Practice these a few times on a separate swatch before you incorporate them into your basket. You’ll get the hang of looping your hook around the post of the stitch below.
Tension Management: Try to maintain consistent tension throughout your project. This will result in a more uniform and professional-looking finished item. If your stitches feel too tight, try a slightly larger hook. If they’re too loose, go down a hook size.
Making It Your Own: Customization Ideas
One of the joys of crochet is the ability to personalize your creations! This pumpkin basket is incredibly adaptable.
Color Combinations: While classic orange is a favorite, don’t be afraid to explore other autumnal hues. Try a deep burgundy for a dramatic look, a creamy beige for a neutral accent, or even a variegated yarn that offers a blend of fall colors. For the stem, consider a contrasting green or a dark brown.
Size Variations: This pattern can easily be adjusted for different sizes. To make a larger pumpkin, simply add more rounds to the base before starting the sides, or add more rounds to the body of the pumpkin. To make a smaller one, work fewer rounds. Remember that changing the size will also affect the amount of yarn needed.
Adding Details:
Leaves: Crochet a few simple crochet leaves in green or brown yarn and attach them to the stem for an extra touch of nature.
Vine: Create a simple crochet chain in green yarn and attach it to the stem, allowing it to coil around the pumpkin.
Embroidery: Use embroidery floss to stitch small details like tiny dots or a friendly face onto your pumpkin if you’re making a more whimsical version.
Contrast Trim: Add a contrasting border around the top opening of the basket for a pop of color and a finished look.
Caring for Your Cozy Creation
To keep your beautiful crochet pumpkin basket looking its best for seasons to come, a little care goes a long way.
Washing: Hand washing is generally the preferred method for crochet items. Use cool water and a mild detergent. Gently squeeze out excess water, do not wring.
Drying: Lay your pumpkin basket flat on a clean, dry towel, reshaping it as needed. Avoid hanging it to dry, as this can cause it to stretch out of shape. Keep it out of direct sunlight to prevent fading.
Spot Cleaning: For minor spills or stains, you can often spot clean with a damp cloth and a tiny amount of mild soap.
Storage: When not in use, store your pumpkin basket in a cool, dry place. You can stuff it with tissue paper to help it maintain its shape.
Beyond the Basket: Project Ideas
This pumpkin basket is more than just a seasonal decoration; it can be a versatile addition to your crafting repertoire!
Trick-or-Treat Pail: Make a larger version for a child’s trick-or-treating adventures. The sturdy construction will hold plenty of candy!
Gift Container: Fill it with autumn-themed goodies, small handmade crafts, or baked treats for a thoughtful hostess gift.
Desk Organizer: Use it to hold pens, pencils, or other small office supplies, adding a cozy touch to your workspace.
Yarn Bowl: If you’re a fellow crocheter or knitter, this basket can serve as a stylish and functional yarn bowl, keeping your yarn from rolling away.
Table Centerpiece: Arrange a few small pumpkins of varying sizes on your dining table for a charming and festive centerpiece.
Crocheting this decorative pumpkin basket is a wonderfully rewarding way to embrace the spirit of autumn. With its simple stitches and endless customization options, it’s a project that will bring warmth and handmade charm to your home year after year. So grab your hook, choose your favorite fall colors, and get ready to create a truly special piece!
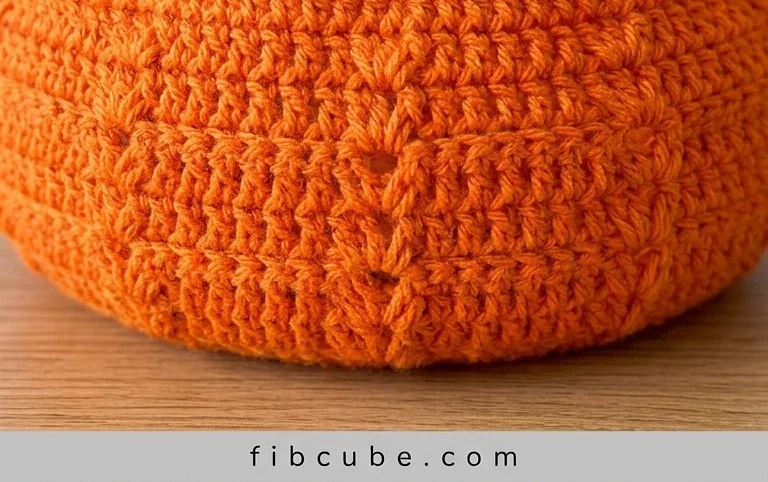
We hope you’ve enjoyed learning to crochet this charming Decorative Pumpkin Basket! It’s a delightful project, perfect for adding a touch of seasonal warmth to your home. We encourage you to grab your yarn and hook and give it a try – you might be surprised at how quickly it comes together!
Don’t forget to share your finished pumpkin masterpieces on social media using the hashtag #PumpkinBasketCrochet – we can’t wait to see your creations! Feel free to experiment with different yarn colors and textures for unique variations. And when you’re ready for your next crochet adventure, be sure to explore more delightful patterns right here on Crochet Ideas!