Hello, fellow yarn enthusiasts! Are you ready to inject some cozy charm and a touch of festive fun into your home this spooky season? Then you’ve come to the right place!
Today, we’re diving into the delightful world of crochet to create adorable little pumpkin cuties. Imagine tiny, plump pumpkins, crafted with soft yarn, their ridges perfectly defining their shape and a cute little stem crowning each one. They’re utterly irresistible and will add a warm, handmade touch to any shelf, mantelpiece, or windowsill.
These little pumpkins are an absolute dream for crochet beginners, offering a simple yet satisfying project. They also make the sweetest, personalized gifts for friends and family, or can be gathered together for a truly charming and unique home decor display. Throughout this tutorial, we’ll guide you step-by-step, covering basic stitches and simple shaping, so you’ll gain confidence and create a whole patch of these delightful decorations in no time!
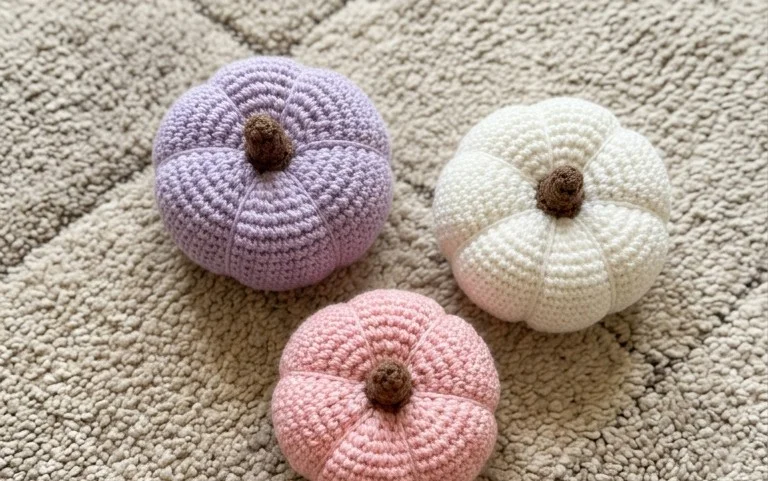
Crochet Pumpkin Cuties: Your Guide to Adorable Spooky Decorations
Get ready to fall in love with autumn and crochet! These adorable Crochet Pumpkin Cuties are the perfect way to infuse your home with a touch of spooky charm and handmade warmth. Whether you’re a seasoned crocheter looking for a quick and satisfying project or a curious beginner eager to dive into the world of yarn, these little pumpkins are sure to bring smiles. They’re incredibly versatile, making them ideal for trick-or-treat goodie bags, classroom treats, or simply adorning your bookshelves and mantels with festive flair. Let’s get stitching and create some pumpkin magic!
Gathering Your Supplies: Yarn and Hook Harmony
Choosing the right yarn and hook is the first step to a successful crochet project. For these little pumpkins, we want a yarn that has a nice weight and good stitch definition, allowing the pumpkin’s shape to shine through.
- Yarn Recommendations: Worsted weight acrylic yarn is your best friend for this project. It’s widely available, comes in a fantastic range of colors, and is durable and easy to care for. For classic pumpkin hues, think oranges, creams, and even some deep reds or yellows. Don’t forget a contrasting color for the stem – a nice brown or even a deep green works beautifully. If you’re feeling adventurous, you could even use variegated yarns for a unique, multi-tonal effect.
- Hook Size: A size G-6 (4.0 mm) or H-8 (5.0 mm) crochet hook is typically a good starting point for worsted weight yarn. The exact size might vary slightly depending on your personal crocheting tension. The goal is to create a fabric that’s not too loose (which could create gaps) but also not too tight (which can make the piece stiff). A tighter tension can create a more compact, firmer pumpkin, while a looser tension might result in a softer, more pliable pumpkin.
Mastering the Stitches: Your Crochet Toolkit
These pumpkin cuties are designed to be beginner-friendly, relying on a few fundamental crochet stitches that are easy to learn and execute. Once you’ve got these down, you’ll be well on your way to pumpkin paradise!
- Magic Ring (or Adjustable Ring): This is a fantastic technique for starting crochet in the round without leaving a hole in the center. It creates a neat and tidy beginning for amigurumi-style projects like our pumpkins. If you’re new to this, there are plenty of video tutorials available that demonstrate this technique visually.
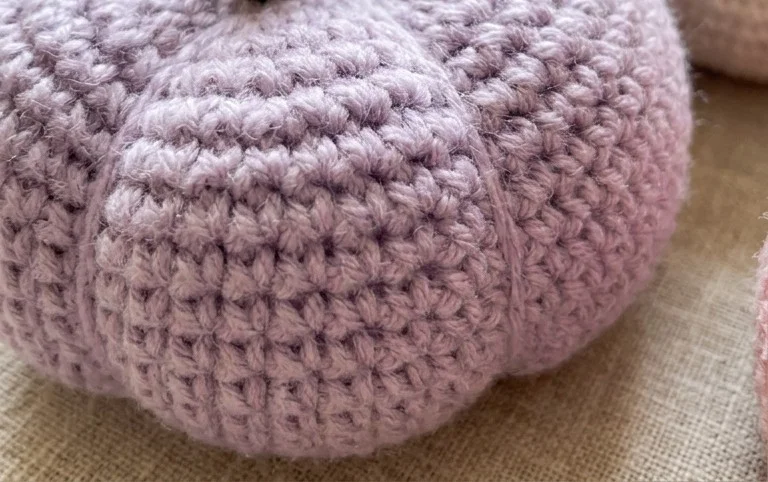
- Single Crochet (sc): This is the most basic crochet stitch. It creates a dense, firm fabric that’s perfect for stuffing and shaping. You’ll be using this stitch for the main body of your pumpkin.
- Increasing (inc): To create the round, slightly flattened shape of a pumpkin, you’ll need to increase your stitch count. This is usually done by working two single crochet stitches into the same stitch from the previous round.
- Decreasing (dec): To close off the top of the pumpkin and attach the stem, you’ll be decreasing your stitch count. The most common method is the “invisible decrease,” which involves working a single crochet through the front loops of two stitches. This creates a neater finish than a standard decrease.
- Slip Stitch (sl st): This stitch is used to join rounds and to finish off your work.
Tips for Beginner Pumpkin Patchers
Embarking on your first crochet project can feel a little daunting, but with these tips, you’ll be creating charming pumpkins in no time!
- Practice the Stitches: Before diving into the pumpkin pattern, take some time to practice your magic ring, single crochet, increases, and decreases. Use a scrap piece of yarn and a larger hook to get a feel for the movements.
- Use a Stitch Marker: When working in the round, it’s essential to keep track of where each round begins. A stitch marker is your best friend for this! Place it in the first stitch of each round.
- Count Your Stitches: This is crucial! Especially during the increase and decrease rounds, counting your stitches after each round ensures you’re on track and your pumpkin will form correctly.
- Don’t Be Afraid to Undo: If you notice a mistake, don’t panic! Crochet is very forgiving. Simply “frog” (rip it, rip it!) your work back to the mistake and correct it. It’s part of the learning process.
- Stuffing is Key: For a nice, plump pumpkin, don’t be shy with the stuffing! Use polyester fiberfill or even scrap yarn. Stuff evenly to avoid lumps and bumps.
- Weave in Your Ends Securely: Before you start adding decorative touches, make sure all your yarn ends are woven in securely to prevent unraveling.
Customizing Your Pumpkin Patch: Colors and Sizes
The beauty of crochet is its endless customization potential. These pumpkin cuties are no exception!
- Color Play: Beyond the classic orange, get creative with your color choices!
- Variations: Try shades of white, cream, pale yellow, or even a deep plum for a more sophisticated look.
- Themed Pumpkins: For Halloween, consider black and orange stripes, or even purple and green for a spooky, witchy vibe.
- Fall Colors: Embrace the season with warm browns, deep reds, and golden yellows.
- Size Matters: The size of your pumpkin is determined by the yarn weight and hook size you use, as well as the number of rounds you crochet before decreasing.
- Smaller Pumpkins: Use a lighter weight yarn and a smaller hook, or simply work fewer rounds. These are perfect for trick-or-treat favors or small decorative accents.
- Larger Pumpkins: Opt for a bulkier yarn and a larger hook, or add extra rounds to increase the circumference and height. These make statement pieces for your home decor.
Caring for Your Crochet Creations
Your handmade pumpkin cuties are durable, but a little care will ensure they bring you joy for seasons to come.
- Washing: For most acrylic yarns, you can gently hand wash your pumpkins in cool water with a mild detergent. Avoid harsh chemicals or bleach.
- Drying: Gently squeeze out excess water, but do not wring. Reshape the pumpkin and lay it flat to air dry. Avoid putting them in a clothes dryer, as the heat can damage the fibers.
- Spot Cleaning: For minor spills or dust, you can often spot clean with a damp cloth and a little mild soap.
Beyond the Basics: Project Ideas for Your Pumpkin Cuties
These little pumpkins are incredibly versatile! Once you’ve mastered the basic pattern, let your creativity run wild with these project ideas:
- Standalone Decorations: Simply place them on shelves, windowsills, coffee tables, or mantels for instant autumnal charm.
- Garland Fun: String several pumpkins together with a sturdy yarn or twine to create a festive Halloween garland.
- Gift Toppers: Attach a pumpkin to the top of a gift for a unique and handmade finishing touch.
- Bowl Fillers: Fill a decorative bowl with a medley of your crocheted pumpkins for a cozy centerpiece.
- Keychains or Bag Charms: Use a smaller version and attach a keychain ring or clasp to create a cute accessory.
- Play Food for Little Ones: If made with soft, washable yarn and no small embellishments, these can be a fun addition to a child’s play kitchen.
- “Crochet Spooktacular” Display: Combine your pumpkins with other Halloween crochet projects like ghosts, bats, or spiderwebs for a truly immersive display.
So, grab your yarn, hook your way into autumn, and enjoy creating these delightful Crochet Pumpkin Cuties! They’re a wonderfully rewarding project that brings a little bit of handmade magic and spooky cheer into your life.
“`html
And there you have it – your very own adorable crochet pumpkin cuties, ready to add a touch of handmade charm to your spooky season! We hope you’ve enjoyed this pattern and are excited to bring these little gourds to life. Don’t forget to share your finished creations with us on social media using #CrochetPumpkinCuties – we can’t wait to see your unique color combinations and embellishments!
Feel free to get creative with different yarn weights, sizes, and even add tiny crochet stems or leaves. Ready for your next crochet adventure? Explore our other seasonal patterns and keep those hooks busy!
“`